
Your Complete Invisirail Installation Guide

Glass railing systems are all the rage these days. They are an easy, affordable way to spice up your indoor and outdoor home décor. Glass railings provide a clear, uninterrupted view that is lacking in other types of railing systems. And if you want to bring in an element of chic elegance and class to your décor style, nothing does this better than the Invisirail glass railing system.
With the increasing popularity of glass railings, Invisirail is truly a cut above the rest. The brand provides everything you need to create your own slice of elegant heaven right in your home. Whether you’re looking for an outdoor or indoor solution, products from Invisirail will help you turn your home design dreams into reality.
But, after buying one of these systems for yourself, what’s next? What goes into installing a glass railing system? What if you’re planning to use wood posts? Can you DIY the installation or should you just hire a contractor? Here’s everything you need to know about glass railing installation.
Featured Products

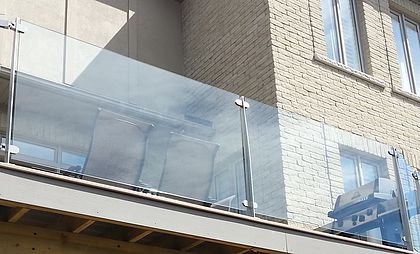
Components of an Invisirail Glass Railing System
Invisirail provides a wide range of products that you can use to create your own custom glass railing design. This versatility is just one of the things that have made the brand so popular over the years.
However, these glass systems can be broken down into a number of essential components that must be present in any system. These components include:
Obviously, these are the components that you would need to install just one section in your glass railing. The total number that you would need of each depends on the actual length and design of your glass railing system.
Post Information and Tips
When it comes to installing your posts, you should always do so by following the deck layout that is provided with the product. Also, always make sure to install one section at a time. Keep in mind that you shouldn’t install all posts before installing your glass panels. That way, you can leave yourself room to make any minor adjustments to the post as needed.
Invisirail Installation Guide
1. Gather any Additional Tools or Supplies
For your installation, you will need the following tools:
- Tape measure
- The right sized Bolts
- Drill and assorted drill bits
- Door shims to help you make fine height adjustments
- 2 short pieces of 2”x4” or 4”x4” wood to support the glass panels
If you’re working with the Invisirail Double Universal Angle Connector, you should also add a Cobalt 5/16” drill bit to your equipment list.
It’s also important to keep in mind that installing glass panels is a two-person job. This is to ensure that you can handle and install the glass panels safely.
You should also do all the installation work while wearing the right safety gear. In this case, that would include working gloves and safety glasses at a minimum.
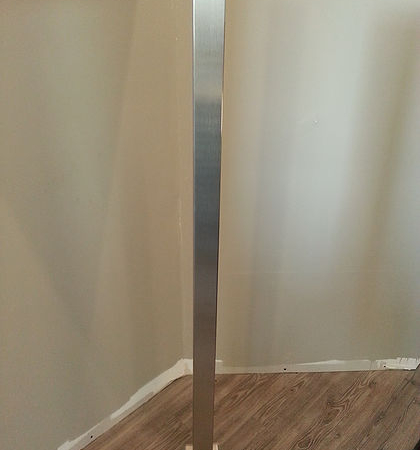
2. Install the Posts
- When installing your posts, make sure to consult the deck drawing that comes with the product. This will help you determine the right post installation order. Start with the post labeled #1 and install.
- Make sure that you have the right blocking in the joists. This will help keep your posts secure.
- You should also keep all posts as plumb as possible.
- Once the first post is set up, use it to guide you in placing the next one. Add 1-7/8” to the measured size of the glass panel that you will be using. This will leave enough space for the connectors.
- You can make this measurement, either from the center, or the from end of one post to the end of the next one.
3. Disassemble the Connectors
- Separate the top and bottom part of each connector.
- Make sure to keep all the pins and nylon bushings safe. You will need them later when installing the connectors.
- Keep the Invisirail Bolt and Pin Location Chart in hand. It will give you the right instructions for when the pins and bushings will be required.
4. Installing the Connectors
There are a couple of different scenarios that you can run into when installing Invisirail connectors. This all depends on the connector type and the post materials that you are using. Here is a breakdown of how to install connectors in each case:
Using Invisipost and Straight-Run Connector to Straight-Run Connector
- Disassemble the connectors.
- Install the top bracket at a height of 40 inches above the deck surface for a 42-inch rail height. If you want a 36-inch rail height, install the connector at 34 inches.
- Try not to make the lags too tight. This will cause stripping.
- Instead, make sure that the connector is snug against the post. You should still be able to turn in by hand force.
Using Invisipost and Straight-Run Connector to Universal Angle Bracket
- Start by disassembling the glass connectors and clamps.
- Install the top bracket at 40 or 34 inches above the deck surface for the rail height that you want.
- Secure the brackets to each other by driving the bolt through the straight clamp and into the angle bracket.
- Ensure that the connection isn’t too tight to keep the lags and bolts from stripping.
Using Invisipost and Universal Angle Bracket to Universal Angle Bracket
- Disassemble the angle brackets by removing the hinge screw and locking pin from the hinge. Make sure to keep the pin and nylon bushing.
- Use the Cobalt 5/16” drill bit to drill out the thread of the mounting hole in the hinge. Do this to only one bracket.
- Once this is done, insert a short 5/16”x1” bolt through the hole you have just drilled out.
- Then, insert this through the Invisipost by screwing it into the other angle bracket thread.
- Finish off this installation by reattaching the bracket to the hinge on the angle bracket. Do this by using a hinge screw and set screw.
- Make sure that the bracket is secure, but can still be turned by hand force.
Using Wood Posts/VISTA Aluminum Posts and Straight-Run Connectors
- Disassemble the connectors.
- Use stainless steel lag screws for your installation. And if the post material is particularly hard (like Kayu hardwood), make sure to pre-drill a pilot.
- Using the Invisirail template, map out where each connector should go on the post.
- Install the top bracket at either 34 or 40 inches, depending on the rail height that you want.
- Don’t make the lags too tight as this will cause stripping.
Using Wood Posts/VISTA Aluminum Posts and Universal Angle Brackets
- Disassemble the universal angle brackets as explained above.
- Use the Invisirail Template to determine where each connector ought to go.
- Use stainless steel lag screws to install the top brackets.
- Make sure to install the top bracket at a height of either 34 or 40 inches above the deck surface, depending on the rail height that you want.
- To secure the bottom brackets, use a through bolt.
5. Glass Panel Installation
Installing the glass panels is usually the last step of setting up any railing system. It’s a good idea to work from one section to the next, instead of installing all the posts at once. This will give you enough room to make any changes, should they be necessary.
It’s also a good idea to have two or more people working together when installing the glass panels. This will ensure that you are able to handle the panels safely, without any risk of breaking the glass or injuring yourself.
Here are the steps to follow during the glass panel installation:
- Set the two short pieces of wood 2”x4” or 4”x4” on the deck edge and between the posts. This will help you support the glass panels during installation.
- You can use the door shims to help with fine height adjustments. Make sure that the pins are aligned to the holes or notches in the glass panel.
- Find the right glass panel to install in the section that you’re working on. This should be easy since all glass panels are labeled appropriately.
- With great care, pick up the appropriate glass panel and set it into position. The notches in the glass should be at the bottom.
- Make sure to fasten the top brackets first. This will help hold up the glass panel in position.
- To fasten your brackets, take the bottom half and slide in the pin into the top half that you have already installed. Make sure that you tighten the screws enough but avoid stripping them.
- Ensure that the bottom connector is completely flush with the top half. This will ensure that the pin is placed correctly in both halves of the connector.
- When you’re done, all the connectors should be parallel to each other. The screws should also be tightened to secure the glass panel.
- In case the bracket does not slide in easily into the sections that you have already installed, you may have made the connection too tight. Simply loosen it and try again.
- Once the pin is aligned correctly, tighten the screws.
- Keep installing each section by post and glass panel number until you are done.
Conclusion
Glass railing systems are a great way to make any outdoor or indoor space feel more open and modern. When it comes to the installation, You can either choose to DIY it or work with a professional contractor. Either way, making sure that your glass railing is set up correctly only ensures that you will be able to enjoy it for a long time to come.
